Feeds:
Posts
Comments

Archive for the ‘Peggy’s Favorites’ Category

istock_000005727392medium

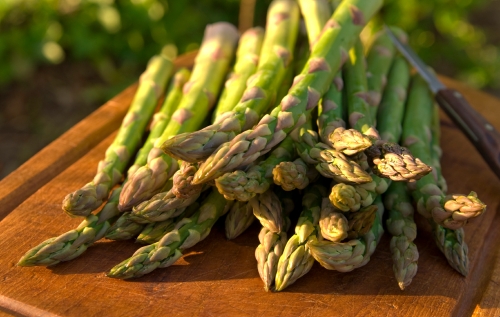
Phyllo Asparagus Spears

These are easy to make, but take some practice.  I would recommend you make them at least once before you make them for a special occasion.  The next time I make these I will make sure to take photos as they are very elegant as well as delicious.

Ingredients:

  • 24 asparagus spears, wood ends trimmed
  • 6 sheets frozen phyllo, thawed
  • 3-4 tablespoons melted butter
  • 12 thin slices prosciutto (about 6 ounces), cut in half crosswise
  • 1 cup grated Parmesan cheese (or more)

Method:

Preheat oven to 450 degrees. Line a baking sheet with parchment paper.

Steam asparagus in a steamer basket set over 1-inch of boiling water just until bright green, about 2 minutes. Blanch them under cold water (helps to retain color and flavor) Transfer to a colander to cool. Place 1 sheet of phyllo on a work surface (cover the remaining phyllo with a damp clean towel). Brush lightly with butter. Cut into 4 rectangular pieces.  Cut the asparagus spears down to 4 inch lengths.

Place 1 piece of prosciutto on each phyllo rectangle, lining up along 1 short edge. Arrange an asparagus spear over the prosciutto, letting the tip lay beyond the top edge of the phyllo. Sprinkle with Parmesan (I like it more than most). Roll up and secure the edge of the phyllo with butter, if necessary.  When rolling, leave the asparagus tip unwrapped about one inch.  Wrap foil around the exposed asparagus tip so it doesn’t burn.  This is optional, but I find it’s prettier if it’s wrapped while baking. Arrange on prepared baking sheet. Repeat with remaining ingredients.

Bake until phyllo is golden brown, about 5 minutes.

Read Full Post »

Early Morning Mendocino

MENDOCINO SLAW

This isn’t a typical cole slaw recipe slathered in mayonnaise.  It’s not just delicious… but it’s a colorful and beautiful addition to your table.  The quantities are approximate and really vary depending upon the size of each item of produce.  Have fun with this recipe and experiment with the dressing.  This is one of those “a little bit of this and a little dab of that” recipes… Be sure to pair this with the Ahi Tuna Wonton Crisps.

Ingredients:

2 Carrots:  Cut into match stick shape about 1.25″ long.
1/3 Cup Snow Peas:  Cut off ends and julienne them close to the size of the carrots.
1 Small Red Bell Pepper:  Cut into match stick shape about 1.25″ long.
1/2 Small Jicama:  Cut into match stick shape about 1.25″ long.
1/2 Head Napa Cabbage (if large):  Cut with a knife in strips
1/4 Red Cabbage : Cut into Strips
1/2 cup  Cilantro: chopped
Add all ingredients together in a bowl.
In a separate bowl prepare dressing using the following ingredients (quantities are approximate and subject to your own taste):
1/2 cup of mayonaise
1 1/2 tablespoon mustard
1 1/2 tablespoons red wine vinegar
1 teaspoon honey
season with salt (to taste)
Add a small amount of blended dressing to mixed slaw.  Do not overdress it!  This slaw is best if left reasonably dry.
At the end with add some chopped cilantro.

Read Full Post »

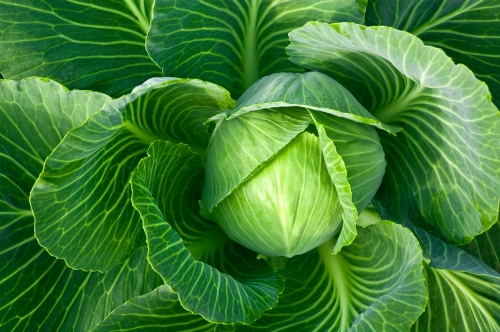
Cabbage head

S’Chee – Russian Cabbage Soup


S’Chee (I’ve been pronouncing this “Shay” my whole life and was just corrected by a nice reader who said it’s actually “Shchee”) is a very traditional Russian cabbage soup.  The recipes vary and have been passed from family to family in different regions for generations.  This is the recipe my family has used for decades (and no we aren’t Russian 🙂

Making this soup is a process and takes the better part of a day.  Plan to prepare it slowly, without pressure and enjoy the process.  You won’t believe the flavor… It makes enough for about 8-10 very healthy servings.  We used to make it and freeze smaller servings to enjoy overtime.   Once you’ve made this, this soup will become part of your family’s winter tradition too.

Ingredients, divided by steps:

3 pounds fresh beef brisket

4 pounds beef marrow bones, cracked

1 large yellow onion

3 carrots

1 parsnip

1 turnip

____________________________________

8 cups boiling water

3 pounds, fresh tomatoes – peeled, chopped (or 1 large can sold pack tomatoes – drained)

1.5 tablespoons of tomato paste

Herb bunch: 6 sprigs parsley, 3 leeks (white parts), 3 celery tops, 2 bay leaves, 5 sprigs of fresh dill – tie together

2 tablespoons of sea salt

_____________________________________

1 cup finely chopped onions

1/2 cup finely chopped celery

1/2 cup finely chopped carrots

3 garlic cloves, diced

1 pound sauerkraut

7 cups of shredded cabbage 

_____________________________________

4 tablespoons sugar

3 tablespoons – fresh lemon juice

1/2 cup finely chopped fresh dill

1 pint sour cream

Preheat the oven to 500 degrees.  In a large, shallow roasting pan arrange the meat, bones and whole/peeled onion, carrots, parsnip and turnip (all in one layer in the pan.)  Roast for 20 minutes on the middle shelf of the oven, turning the meat and vegetables occasionally so they brown on all sides.  Then transfer each piece to a large soup stockpot and put remaining fat in roasting pan in a small bowl to be saved for later.

Into the roasting pan – pour the 8 cups of water.  With a metal spatula or large spoon, scrape all the remnants at the bottom of the pan and mix into the water.  Empty this mixture into the soup stockpot.  If the meat and vegetables are not covered – keep adding a bit more until they are.  Just don’t add too much of this water or the soup base will be diluted.

Adjust the temperature so the kettle is cooking over a medium heat.  As it’s cooking, use a slotted spoon to skim off the foam and scum that appears to rise to the surface.  This will happen for awhile… keep skimming. When the stock reaches a boil, turn the heat down to barely a simmer… don’t let it boil.  Skim again and then add the tomatoes, tomato paste, herb bunch and salt.  Partially cover the stockpot and simmer very slowly for about 2 hours, skimming consistently during this time.

While the stock is simmering, use your largest frying pan… heat 5-6 tablespoons of the beef fat you reserved earlier.  Add the chopped onions, celery and carrots.  Cook them over low heat, stirring occasionally until they barely color.  Just before you remove them, add the garlic. . . You don’t want to cook the garlic too long or it will burn and lose flavor.  This process will take about 15 minutes.

Wash sauerkraut in a sieve under cold water.  This will ensure the brine in the sauerkraut doesn’t overwhelm the flavors in the stock.  Squeeze all the water out of the kraut -one handful at a time and chop it up. Add sauerkraut to the same frying pan with the other vegetables.  Cook thoroughly for a minute or two on medium heat – then lower the heat and blend with other vegetables.  Cook until the cabbage begins to wilt. At that point, reduce heat again and partially cover the pan.  Add a spoonful of the stock from the stockpot every 8 minutes or so to moisten the vegetables, and let them slowly braise for about 30 minutes.  Remove the pan from the heat and put it aside, partially covered.

When the soup in the stockpot has cooked for about 2 hours, with a slotted spoon – remove all the vegetables and the herb bunch and throw them away.  All of their flavor is now in the stock and they are no longer needed.  Add back to the stock – the braised cabbage and vegetables.  Stir in the sugar and lemon juice and bring the soup to a boil… then reduce the heat to a low simmer.  Cook, partially covered, for another 1.5 hours.

At this point, the S’Chee should be done. However, if you feel the stock hasn’t reached it’s full flavor but the brisket is tender – temporarily remove the brisket and continue cooking the stock.  The brisket should be very tender and just falling apart… just don’t overcook the meat or it will lose this tenderness.

When you feel the soup is done… turn off the heat and remove all the marrow bones.  Just make sure all there isn’t any marrow left sticking to the bone – all of it should be in the soup, so scrape it out if you need to and add it to the soup.  This is what gives the stock its rich flavor.  Let the soup rest awhile so that the fat will rise to the top.  Skim as much of it as you can and reheat the soup again before serving.

Pour soup into large soup plates and float a tablespoon of sour cream on each serving.  If you like to serve from a tureen, pour soup into a heated tureen first and pour the 1/4 chopped dill on the top before ladling the soup into bowls.  Serve with dark bread or pumpernickel.

This soup is so flavorful and hearty, it is a meal in itself….

Read Full Post »
Mushroom Croustades

This recipe is fabulous when you’re throwing a party.  They are always such a bit hit… and any leftover duxelle (fancy French word for filling) may be used as a delicious topping for potatoes, eggs or on top of a filet mignon.

The “croustades” are little cups made with round slices of soft white bread that are pressed into tiny muffin tins and slowly roasted so they hold their cup-like shape.  Filled with a creamy, herb-flavored mixture based on the classic French mushroom “duxelles”, they are an elegant cocktail horse d’oeuvre that requires very little labor.  However, your friends and family will think you are quite the “gourmet!”  You may make both the cups and the filling in advance. This recipe is easily doubled for larger parties or to have another batch in the freezer for easy assembly when those unexpected guests arrive at your house!

(Serves 6-8)

Ingredients

Cups:

  • 24 slices fresh, thinly-sliced white bread (Believe it or not, Wonder works the best – bad bread works better than good bread – however, Whole Foods white bread in the bakery does work if you’re a snob and don’t want anyone to see Wonder in your shopping cart)
  • 2 tablespoons very soft butter

Mushroom Filling:

  • 4 tablespoons butter
  • 3 tablespoons finely chopped shallots
  • 1.5 pound button or crimini mushrooms (finely chopped)
  • 2 level tablespoons of flour
  • 1 cup heavy cream
  • 1/2 teaspoon salt
  • 1/8 teaspoon cayenne (add more to taste – I like more cayenne)
  • 1 tablespoon finely chopped parsley (you may want to add more)
  • 2 tablespoons finely chopped chives
  • 1/2 teaspoon lemon juice
  • 3-4 tablespoons grated Parmesan cheese (may want more)
  • Butter

For 24 cups, you need a 3-inch plain or fluted cookie cutter and 24 tine muffin tins, each about 2 inches wide at the top.  You can buy them, usually combined in panels of twelve in most hardware stores or possibly Williams-Sonoma.  It is also great to have one of those little wooden pestles you can buy from Pampered Chef to help shape the cups into the tins – they work best.

With a pastry brush, coat the inside of the tins heavily with the 2 tablesppons of soft butter.  Cut a 3-inch round from each slice of bread.  Carefully fit these into the muffin tins, pushing the center of the bread into the well and gently molding it around the botton of the tin with the tip of your finger (if you have a small wooden pestle or small round bottle slightly smaller than the bottom of the muffin tin, use this to force the bread in, but don’t be rough or the breat will tear.  Each bread round, however you mold it, should form a perfect little cup.

Preheat the oven to 400 degrees and bake the cups for about 10 minutes, or until the brown lightly on the rims and on the outsides.  Remove them from the tins and let them cool.

The mushroom filling is made as follows:

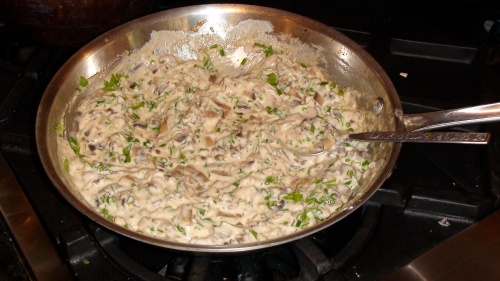
Chop the shallots and mushrooms very, very fine.  In a heavy 10-inch frying pan, slowly melt the 4 tablespoons of butter and, before the foam subsides, add the shallots.  Stir them almost constantly, over moderate heat, for about 4 minutes without letting them brown; then stir in the mushrooms.  Mix them well into the butter and see that they are thoroughly coated before leaving them on their own.  In a few minutes they will begin to give off a good deal of moisture.  Stir them now from time to time, and continue to cook until all the moisture has evaporated – 10 to 15 minutes.  Then remove the pan from the heat.

DSC02789

To finish the filling, sprinkle 2 level tablespoons of flour over the mushrooms and stir thoroughly together until not a trace of flour is visible.  Immediately pour over this 1 cup of heavy cream and, stirring continously, bring the mixture to a boil.  It will thicken heavily, turn down the heat to the barest simmer, and cook a minute or two longer to remove any taste of raw flour.  Remove the pan from the heat and stir in the seasonings and herbs; salt, cayenne, parsley, chives and lemon juice.  Taste, transfer the filling to a bowl.  Cover with saran and cool in the refrigerator until you are ready to assemble them.

Fill the cups, mound the filling slightly. Sprinkle each with Parmesan cheese, dot with a speck of butter and arrange on a cookie sheet. Heat about 10 minutes in a preheated 350° oven (do this about 10 minutes before you intend to serve them); Watch them carefully as they burn easily.  Serve immediately.

Read Full Post »


Christmas Cheer
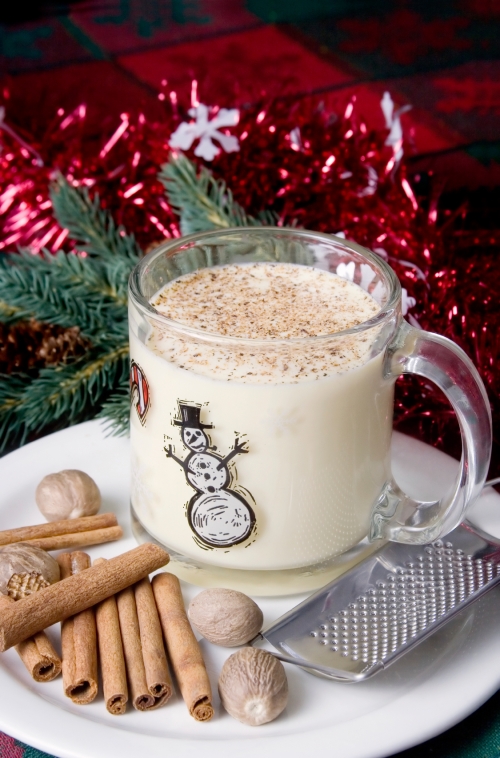
Homemade Tom and Jerry Batter (Egg Nog)
This recipe is a variation of a long lost recipe my mother used to make years ago.  Once you have homemade batter you’ll never buy the jared stuff at the store – or commercial Egg Nog.  We don’t consider this to be perfected so I encourage you to play with the spices and consistency while making it.  My mother used to make this in large batches – place and refrigerate it into labeled and decorated small jars and give it as hostess gifts during the Holiday season.  Note:  When refrigerated the batter does separate and needs to be stirred before using.
  • 12 eggs, separated
  • 1/2 teaspoon salt
  • 1/2 pound butter, room temperature
  • 3 pounds confectioners’ sugar
  • 1 teaspoon vanilla extract
  • 1 teaspoon ground nutmeg
  • 1 teaspoon ground cloves
  • 1 teaspoon ground allspice
  • 1/2 teaspoon cinnamon

Directions:

Beat egg whites and salt until foamy in a large glass or metal mixing bowl until stiff peaks form.  mix until the egg whites should form a sharp peak that holds its shape.

Beat the egg yolks to soft peaks in a separate bowl. Beat the butter and confectioners’ (powdered) sugar in a large bowl until light and fluffy. Add the egg yolks and vanilla to the butter mixture; mix. Stir in the nutmeg, cloves, allspice, cinnamon and the egg whites; beat until well blended. Batter can be frozen or kept in refrigerator for several weeks.

For one drink, fill a cup of hot water or warm milk with spiced rum or brandy and stir in 1 heaping tablespoon of batter (or more). Top with freshly grated nutmeg. This makes a great non-alcoholic treat too!

Read Full Post »


istock_000002810077medium1


Smoky Chipotle Shrimp, Roasted Corn Cakes and Salsa Appetizer

We always make this as an appetizer and it is always a favorite at parties.  The corn cakes are so good, they could even take the place of traditional pancakes at breakfast.  You can put anything on the corn cakes, but the shrimp is my favorite.  

Smoky Shrimp

1.5 – 2 lbs medium shrimp

4 tablespoons butter

1 cup softened butter

5 tablespoons of canned chipotle (with adobo sauce – pureed)

1.5 dozen corn cakes

3 chopped green onions

1 cup fresh salsa (see below) 

Sour cream (for garnish)

Peel the shrimp.  In a frying pan, cook the shrimp in the 4 tablespoons of butter over low heat for just a few minutes (about 5) – turn them once.  Don’t overcook.

Puree’ the softened butter with the chipotle puree and set aside (do not refrigerate.)

Place 1-2 shrimp on a corn cake and spread a little of the chipotle butter of the shrimp so it covers, but doesn’t drench the crab cake.  Sprinkle with chopped green onions.  Spoon a little salsa on top.  Just enough to add color and flavor but no so much that someone can’t still hold the cake in their hand.  For an entree, place 3-4 corn cakes on a plate then place 2-3 shrimp per cake on cakes and add butter, green onions and salsa or sour cream.  However you choose to serve them, they will be a big hit.

CORN CAKES:

3/4 cup all purpose flour

1/2 cup coarse cornmeal 

1/2 teaspoon baking powder

1/2 teaspoon baking soda

1 teaspoon salt

1 teaspoon sugar 

1.25 cups buttermilk

2 tablespoons melted butter

1 egg, beaten

1 cup freshly roasted corn kernels (I roast 1 ear of corn on the grill)

2-3 chopped green onions

Place dry ingredients in a bowl and mix together.  In a large bowl, whisk together the buttermilk and butter and then whisk in the egg.  Slowly add all dry ingredients to the liquid and whisk until thoroughly blended. Puree’ 1/2 cup of the corn and fold it into the batter along with the whole kernels and onions.  Add a little buttermilk (if needed) to thin the mixture if it seems to thick.

Using a nonstick pan over medium heat, ladle enough batter to form 2 inch cakes  Cook until golden brown (about 2.5 min on each side)  Batter should make about 20-30 cakes.


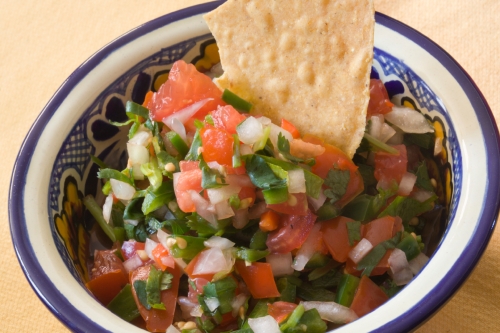
FRESH SALSA

2 cups chopped Roma or Cherry tomatoes

1-1 chopped green onions

2 Serrano chiles, finely chopped

1/4 cup cilantro, finely chopped

2 teaspoons sugar

2 garlic cloves, finely chopped

1/4 cup Mexican beer

2 teaspoons salt

1 lime, juiced

Combine all ingredients and mix well.  Put in the refrigerator for at least 30-45 minutes before serving.

Read Full Post »

Gravy

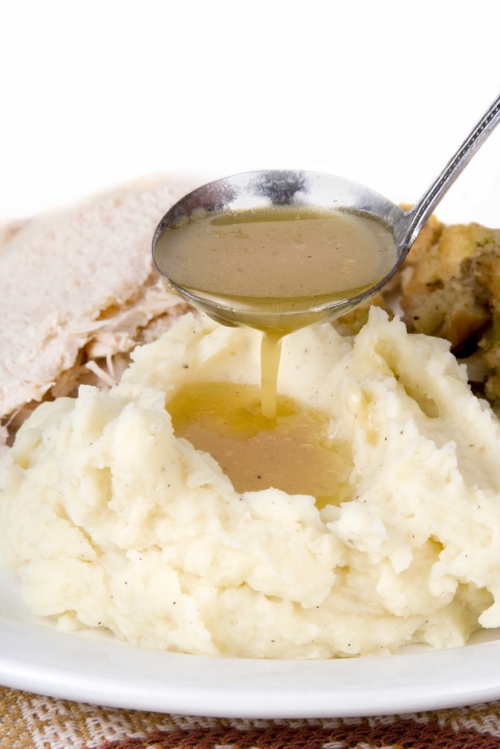
Peggy’s Sensational Gravy

To quote my mother, she is the “Queen of Concepts” not step-by-step recipes.  I asked her to please share her “concept” on how to make gravy as it is probably the best gravy I’ve ever tasted…. ever.

Being “conceptual” isn’t a bad thing, as creative chefs have a knack of making something good from what is around. However, when you can plan to make sensational gravy for the holidays, here is the basis of her technique in her own words:


Ingredients:

Lots of turkey necks (10!!!) with a couple of wings and a drumstick (lots of bones being key to a good broth).  

8 celery whole stalks

1-2 yellow or white onions (leave skins on)

4 medium to large carrots

2 leeks, rinsed well and split

2 parsnips, rinsed and root cut off

1 bay leaf

1/2 bunch italian parsley

1 whole bulb of garlic split across, no need to peel

1 teaspoon sea salt 

1/2 teaspoon whole peppercorns.


Preparation:

Put all turkey parts in large stock pot, add other ingredients and cover with cold water and if you like a good amount of boxed chicken broth. Over high heat bring to low boil, then simmer for about 3 hours (DO NOT LET IT BOIL) skimming off foam/scum as needed.  

Remove from heat, cool (temp?? don’t know, see what the experts say) and strain through colander reserving only the broth.  Strain the broth again through cheesecloth.  

At this point, I reduce it more to taste as I like it to be a rich reduction. You may tailor it to suit your audience. To suit myself, I add some mushrooms and shallots that have been sauteed and reduced as in the mushroom filling, except in a larger cut/dice.  This way they have that intense flavor.  

Beyond that I add some turkey meat from the gelatinous boney areas i.e. neck and thigh meat (not from broth as it will not have flavor).

Once your turkey has roasted, set the pan over medium heat on the stove top. Discard all but 2 Tb of fat.  To the pan add 2 Tb of butter.  When melted add 1/2 up of white wine,  2 to 4 Tb of AP flour to the pan and, using a whisk, stir constantly to incorporate the fat and flour. Once you have a consistent paste add the finished warm stock in a steady stream while you stir to work out any lumps. Cook (simmer) until the gravy has thickened, about 10  minutes. Season to taste with salt and pepper and serve.

Read Full Post »

DSC03571

Chile Cheese

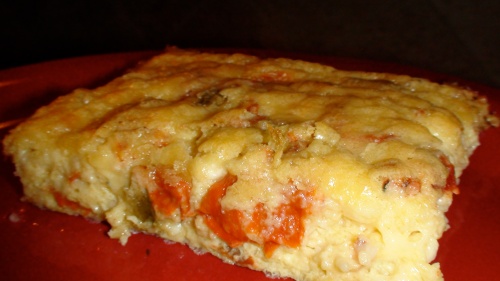
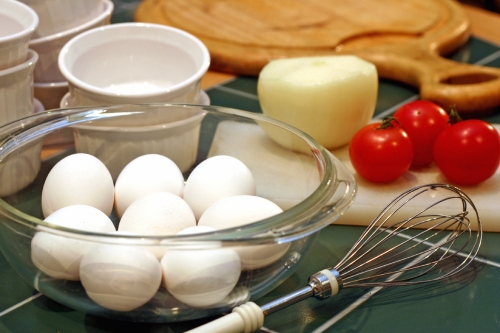
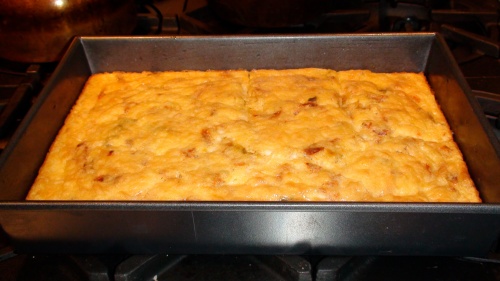
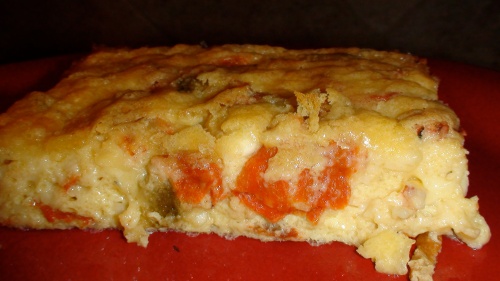
This is like a crustless quiche that is great for appetizers or brunch.  For appetizers, chill and cut into small squares.  Serve just out of the oven for brunch.  You can vary this recipe by adding whatever you feel will taste good (i.e. sundried tomatoes and asparagus instead of chiles)… but this very basic recipe is a great stand-by.

(10 servings)

Ingredients:

  • 1/2 cup flour
  • 1/2 teasp salt
  • 10 eggs
  • 3-4 cups, blend of shredded Guyeure, white and yellow cheddar cheeses (vary depending on how cheesy and rich you want this)
  • 1 teaspoon baking powder
  • 2 cups cottage cheese
  • 1/4 cup butter. Melted
  • 8-12 ounces diced roasted Anaheim chiles (I use roasted chiles from http://www.newmexicanconnection.com – vary the chiles depending on how much heat you want.)  The batch in these photos used roasted red chiles that didn’t have as much heat as I would normally want.

Directions:

Preheat oven to 350 degrees.  In a medium bowl, beat eggs until light and

lemon colored.  Add remaining ingredients and blend until smooth.

Pour into a lightly buttered 9 x 13 baking pan and bake 35-45 minutes or until top is browned

DSC03562

DSC03573

Read Full Post »

Peggy’s Wonton Crisps

Preheat oven to 350 degrees

Very lightly oil a baking sheet with sesame oil.

Cut square wonton wrappers into four round(ish) pieces.  I use pinking
shears so they look more home spun.  Scissors OK too.

Place them on a cooking sheet and lightly brush with more sesame oil.
Lightly.  Then, sprinkle them with sesame seeds.

Bake for 5 to 8 minutes or until brown and crispy.  Watch them as they
burn easily.

Store in airtight container.  Use within 2 days.

Asian slaw

Fresh pea pods, carrots, jicama(equal parts), a little napa cabbage.  Cut all of these vegetables into
match stick shape 1 to 1 1.2 inch length.  Toss all and add lots of cilantro.

Dressing:

4 parts mayo,  1 part dijon mustard, 2 tbsp honey, tiny bit of orange
zest, and couple of splashes red wine vinegar (all to taste._

Ahi Tuna

Generously salt and pepper Ahi, and grill on hot  BBQ or range grill
searing on both sides, rare in center.

Make a mixture of soy and wasabi to taste

Assemble:

Lightly dress the slaw, and top each crisp with slaw, a slice of Ahi
and then top Ahi with the wasabi/soy mixture.  Sprinkle more sesame
seeds
in slaw or on top of Ahi if you want.

Read Full Post »

Peggy’s Filet Mignon Ramaki Appetizer

This is a spin on Ramaki using either filet mignon or prime top
sirloin
instead of chicken livers.  Meat and a whole water chestnut
are wrapped in bacon, marinated, then grilled over coals.

Instructions:
Make a marinade using low sodium soy, crushed ginger and crushed
garlic to taste.  Add a small amount of brown sugar, i.e. 1 tablespoon.

Cut meat into generous size chunks, 1.25″ +- cubes.  You want them to
end up med. rare for best results, so don’t be skimpy.
Using lean meaty center cut high quality bacon, slowly render slices
to extract some of the fat ahead of time leaving enough length to wrap
around steak and water chestnut.  Not as likely to flame over the
coals.

Assemble:

Lay out a bacon strip, place a cube of steak in center, top with whole
water chestnut.  Wrap bacon around meat and water chestnut and skewer
with toothpick.

Place appetizers in a tupperware like container, cover with marinade,
and turn every 30 to 45 minutes.  About 4 hours is a good time.  Long
enough to flavor without disguising the ingredients.

Finish

Grill over med hot coals til bacon is crispy and meat is med. rare.

These appetizers are a real favorite with men wanting a more substantial appetizer.  Goes well with
Polynesian food.

Read Full Post »

Older Posts »